The ChipProgUSB software package includes the Virtual Instruments (VI) library developed in the National Instruments' LabVIEW™ graphical development environment. It also includes a few usage examples of these virtual instruments. The library files reside in the LabVIEW folder located in the ChipProgUSB installation directory. The library was created with the 2013 SP1 version of LabVIEW.
The DLL control is based on use of the Application Control Interface. Each VI is a wrapper over the appropriate function exported by the ACI.DLL software module. You should be quite familiar with the Application Control Interface functions and aspects of use in order to use the Virtual Instruments library.
Because of limitations imposed by LabVIEW on passing parameters to functions exported from DLLs, the virtual instruments do not call the ACI.DLL functions directly. Instead, they call functions exported from the intermediate DLL - the ACI_LV.DLL. This DLL packs parameters into structures required by ACI.DLL and then calls its functions. The declarations of functions exported by ACI_LV.DLL are placed in the C/C++ header file named ACIProgLabVIEW.h.
Each virtual instrument has its own front panel. It allows calling an appropriate Application Control Interface function. In order to do this, before launching this function, you should launch the ChipProg by means of the VI with the name ACI Launch. Each virtual instrument has input and output terminals for inputting and outputting parameters of the ACI function served by the virtual instrument.
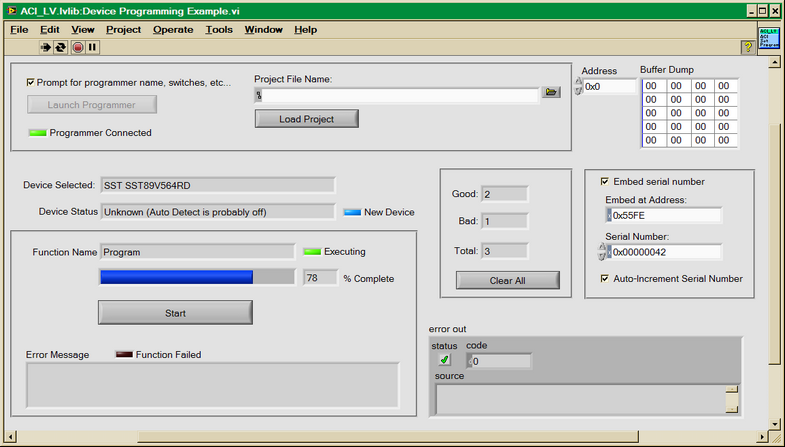
The VI folder includes a sub-folder Examples that contains two use examples for virtual instruments. The "Device Programming Example" demonstrates use of all major ACI functions, namely:
•launch a device programmer
•load a project
•display the device programmer buffer content in the GUI
•display a chosen device in the GUI
•display the device programmer socket's status (if a chosen programmer type supports this feature)
•write the serial number and increment it automatically in the device programmer buffer
•execute programming functions on the device and display the results in the GUI
•count numbers of successfully programmed and failed devices and display them in the GUI
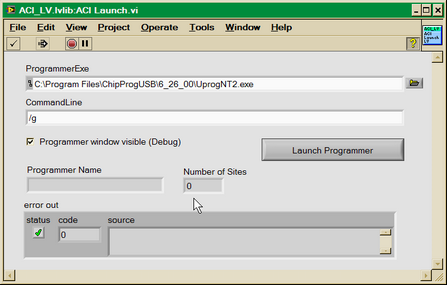
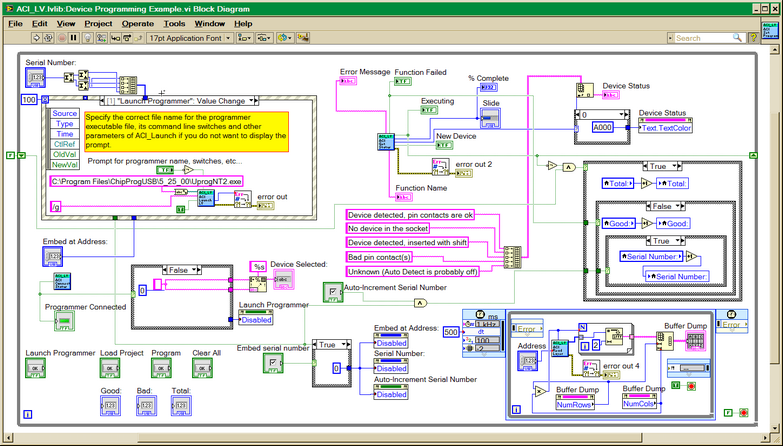
To evaluate the example start up a ChipProg and launch the Device Programming Example by the Run continuously button in the LabVIEW GUI. Then click the Launch Programmer button on the VI’s front panel. This will open a front panel of the virtual instrument ACI Launch. Enter a full path to the ChipProgUSB executable file, for example: "C:\Program Files\ChipProgUSB\6_00_00\UprogNT2.exe" and (optionally) specify the command line parameters. In order to avoid confirming the programmer restart, you can specify the path to the UprogNT2.exe in the constant string in the virtual instrument diagram and uncheck the Prompt for programmer name, switches, etc... box on the front panel (see the diagram below).
Then, after launching the programmer, its current status will become visible in the virtual instrument's front panel. Clicking the Start button launches the operation with the name that you can enter into the Function Name field, for example: Blank Check. If the Function Name field is left blank then the programmer will execute the Auto Programming function. See the pictures below: